linehomedotaboutdotmy galleryline

Monday, February 08, 2021

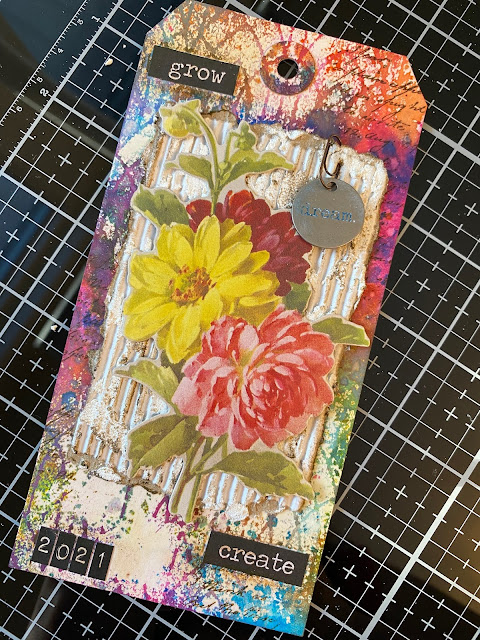
2021 Grow, Create Tag

Have you been following along with Tim Holtz's demos?  I've just recently started tuning in to the Live's on Sundays.  So much to take in.  This week I went back to an older demo called Spritz, Sparkle + Smudge and followed along with a couple techniques.  This is my finished Spritzed Tag.  


Here you can see the tag before I decorated it, along with The Professor Smudge tag.


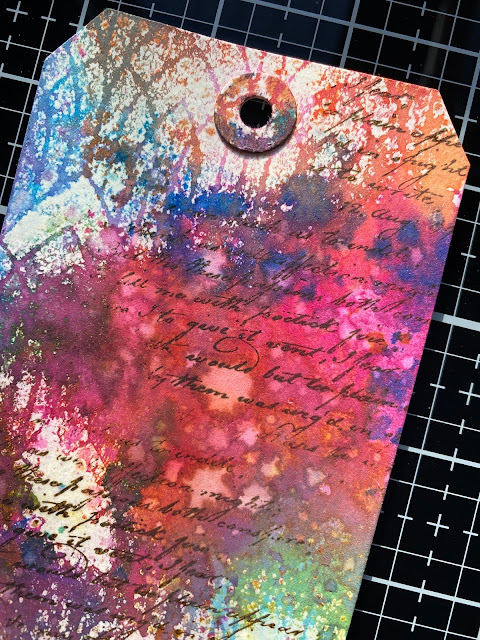
Before adding colour, I spritzed Distress Resist Spray through a stencil on the upper and lower portions of the tag and let that dry.  Next I used several distress inks smudged on my glass mat and spritzed with water to create the colourful background.  I dried between layers then added a few droplets of water and patted ry with a paper towel.  Then I took a couple of the distress inks and blended a little more where the tag wasn't completely covered in colour.  Of course the Resist Spray did exactly that, created a barrier to resist the inks.


At this point the tag was done from a technique perspective.  It was bold and bright and I wasn't quite sure what I would do with it.  I used the script stamp and Archival ink to create some flow and ten began looking through my stash.


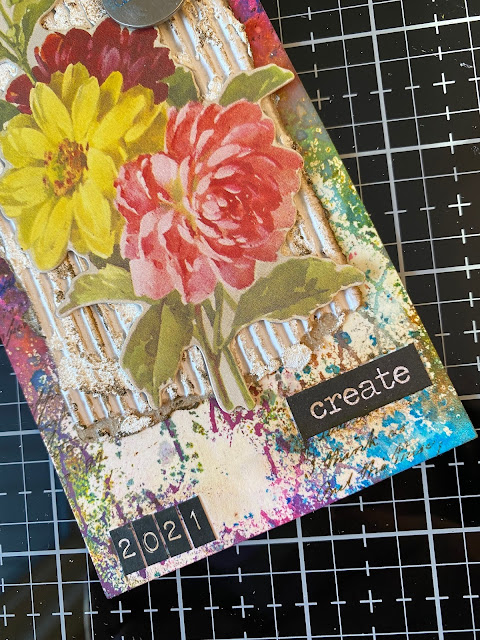
I found a piece of ephemera that went well with the colours but it needed something behind it to ground it so it wouldn't get lost.  I had a piece of white corrugated paper that I tore to size and then added some Grit-Paste.  Once that was dry I added some Vintage Photo crayon and smudged with my finger.  


The only thing left to do was to add the token which I coloured with white paint, rubbed it off then added Broken China crayon and rubbed it into the word.  I used a small paperclip to attach it to the paper.


Supplies:

Distress Inks:  Mustard Seed, Picked Raspberry, Broken China, Milled Lavender, Spiced Marmalade
Distress Oxide:  Mustard Seed
Distress Paint:  Picket Fence
Distress Resist Spray
Decho Arches Stencil
Distress Crayons:  Broken China, Vintage Photo
Archival Ink:  Potting Soil
Ideaology:  Botanical Layers, Label Letters, Mini Paper Clips, Typed Tokens, Big Chat Stickers
SA Stamp:  Dearly Departed (for the script)
Distress Collage Medium, Grit-Paste opaque

Friday, January 29, 2021

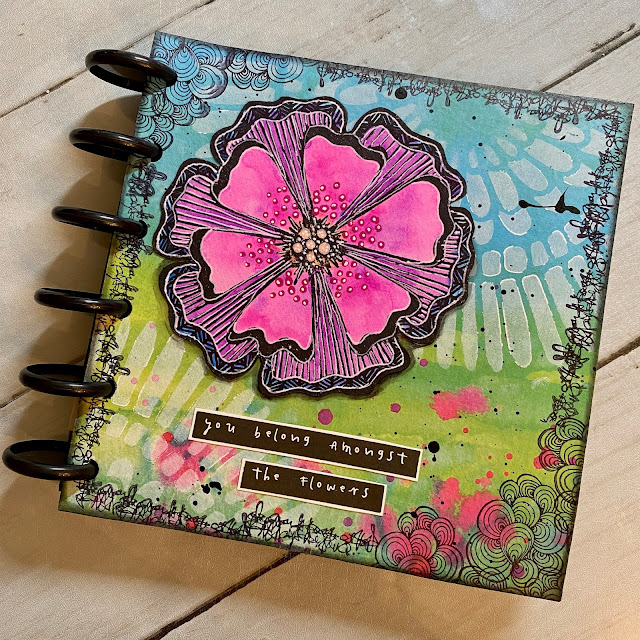
You Belong Amongst the Flowers - Art Journal Page

Whoa!!  How's this for bright!!!  I'm having a bit of fixation with Art By Marlene if you can't tell by my last three posts :). For this background I simply collaged the whole page with a piece of her Rice Paper then added some white paint through the flower stencil, some stamping along the edges with Archival Ink and black splatters.  Easy peasy!! 


This time I tried my hand at watercoloring one of her flower images with her water-colour paints.  I need more practice for sure, but I still love how it turned out!  After watercoloring I added some dots with acrylic markers and then some white gel pen to the edges of the petals and the dots. I adhered this to my page and used a black Stabillo All pencil around the bottom for a bit of a shadow and then added the sentiment which was first applied to white cardstock and then cut.


My 6x6 journal is starting to fill up nicely :)


Supplies:

Art By Marlene Products:
Watercolours:  Whimsy & Bright, Bold & Bright
Collage Paper BM05
Stamps:  BM07, Exclusive Textures BM47
Mask BM08
Word Stickers BM02

Paints:  Dina Wakley Black and White Acylics
Inks:  Archival Jet Black
Arteza acrylic markers, Stabillo All black pencil, Signo Uni-ball white pen

Thursday, January 28, 2021

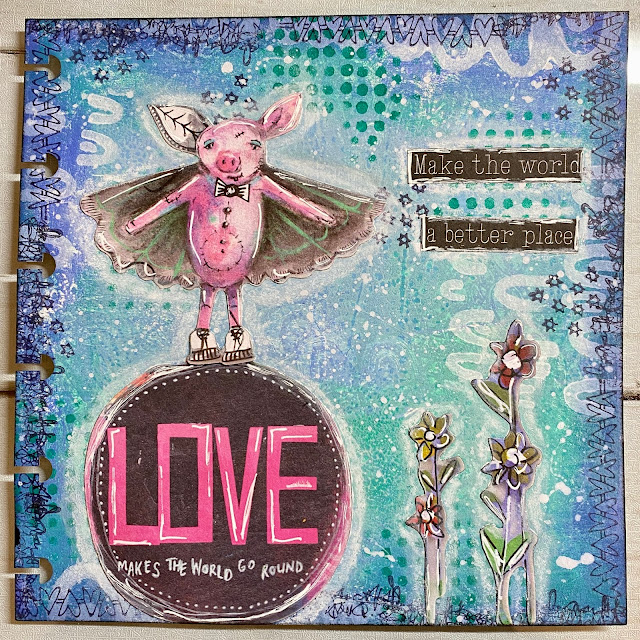
Make the World A Better Place - Art Journal Page

So this is what resulted from the second of the two test pages I made on the 6x6 Gel Press.  You can see the first one here.  I just had to add a bit more paint to the edges and like the first page, went along the edges with Distress Ink this time.  I applied some white and green paint through a stencil, then stamped some little stars and the border in Archival Ink.  Lastly I splattered the page with white paint.


How could you not love this little caped pig?  I gave him the Love globe to stand on :). 


I did some white doodling on the die cuts and went around them with a White Woody Stabilo pencil to highlight.  One more page for my 6x6 journal!


Supplies:  
Paint:  DecoArt Americana Teal Mint, Baby Blue, Blue Harbor, Dylusions Polished Jade, White Linen
Ink:  Chipped Sapphire Distress Ink, Archival Jet Black
Art By Marlene Products:
Stamp BM47
Die Cuts BM05
Stencil TCW Mini Positivity
Word stickers BM02
Stabilo Woody 3 in 1 (white), Uniball Signo pen (white)

Wednesday, January 27, 2021

If You Are Going To Be Weird - Art Journal Page

Finally I have had time to play with my stash of Art By Marlene goodies!!!!  I love the whimsy style, and though I never thought I'd like die cuts for mixed media, I'm loving them!!  This page began with a background I created using a 6x6 Gel Press.  It hadn't turned out the way I wanted, it was a test page really and I put it aside along with another one (you'll see next post).  So I dug it out, added a bit more paint and some Oxide inks to the edges and got to playing!!  I used a few of Marlene's stamps and a stencil with oxide ink for more dimension to the page and also created a border with Archival ink.  Lastly I splattered black paint.  


I already knew I wanted to use these images because I thought they looked good with the background colours I just needed something to ground her.  I cut out some of the swirly Rice Paper and collaged it to the bottom of the page to look like waves and then adhered the rest of the elements.  I outlined a bit with a fine black Pitt pen and I was finished!


I love adding pages to the disc bound journals, I have this 6x6 one and also an 8x8 journal.  These DecoArt paints are gorgeous and I love how the gold shimmers over top.  It's so pretty in real life.


Supplies:
Paints:  DecoArt Americana Baby Blue and Blue Harbor Acrylic, DecoArt Media Fluid Acrylic Gold, Dylusions Black Marble
Inks:  Black Soot Distress Ink, Faded Jeans Distress Oxide ink, Archival Jet Black
Art By Marlene Products:
Stamps:  Exclusive Textures BM47
Texture Plate BM01
Rice Paper BM02
Die Cuts BM06
Word Stickers BM02
TCW stencil Mini Tile Mania


Friday, January 15, 2021

2021 - Art Journal Page

I had an idea for a New Years Page for my disc journal.  And with some inspiration I came up with this :). I absolutely love it!!!  Loved branching out with the dies.  I was inspired by Emma William's card  for the cityscape and Kath Stewart's card for the colours silver and gold together.  


I wanted a night scene so the background was created using Distress Oxide Sprays in Faded Jeans and Chipped Sapphire.  I also mixed a bit of Brushed Pewter Spray Stain in there.  I love that it added to the dimension of the night scene.  The edges were inked with Black Soot Oxide Ink.  Once everything was dry I covered the page in a layer of Micro Glaze since I wanted the white and silver droplets to not react with the background.  Keeps everything more vibrant.  The platters where Picket Fence paint and Brushed Pewter Stain.


Next I went to work on the cityscape.  I cut the 2 images four times, 2x from black card and 2x from silver Kraft paper so I could layer them.  The silver metallic Kraft was toned down a bit with dabs of Mushroom Alcohol Ink.  I sponged the edges of the black card with Brushed Pewter paint and then applied Picket Fence paint splatters.  They were layered on top of each other and then I glued one set of two scenes down and another set over top with foam stickers.  Lots of dimension!  The 2021 was cut from the shadow dies and I did the same toning down with the silver.


It took me a while to figure out how I was going to add fireworks to the page and then realized I had this 3D Impresslit called Radiant - it embosses and cuts!!  The best tip I found was to spritz the cardstock with water prior to cutting and run it through three times.  I cut them in gold metallic Kraft paper and it worked like a charm.  The only thing I found to be difficult was adhering it.  I added craft glue to the centre and edges of the small ones and put a pop up sticker in the middle of the larger two and added craft glue to the edges.  They're not completely adhered around the points but the centres are secure so I'm good with that.  Maybe someone has some tips for me?

I thought the sentiment was perfect for the start of this year.  Love how it turned out and it looks great on display in my craft room :)


Supplies:

Distress Oxide Spray:  Faded Jeans, Chipped Sapphire
Distress Stain Spray:  Brushed Pewter
Distress Oxide Ink:  Black Soot
Distress Paint:  Brushed Pewter, Picket Fence
Alcohol Ink:  Mushroom
Distress Micro Glaze
Gold and Silver Metallic Kraft cardstock
Cityscape Die
Radiant Impresslit
Alphanuemeric Shadow Numbers Die
Small Talk Stickers
Related Posts Plugin for WordPress, Blogger...