linehomedotaboutdotmy galleryline

Wednesday, December 30, 2020

Merry Christmas Gift Bag and Card

Hi there :) I created this Christmas card using this CZ Design HO HO Deer Circle die and the sentiment is from Simon Says Stamp Ornamental stamp set.  The Merry is stamped in Simon Says Stamp Lipstick Red ink.  The nose!!  I love the little red pom pom!!  The snowflake patterned paper is from a 6x6 set from Unity Stamp Company.


See the bag?  This was the inspiration for the card!!  I didn't make the bag but I think it's one of the cutest I've ever purchased!!


The inside sentiment is from Simon Says Stamp Happy Christmas stamp set.


And lastly I'm sharing this table runner, a very special Christmas gift I received this year:


Happy Holidays and wishing everyone a happy & healthy 2021!!


Tuesday, December 29, 2020

Merry Christmas Gift Bag and Tag Set

I mentioned in my last post how I wanted to decorate some Kraft gift bags and tags.  This is the second set I made.


For these I used the Stampers Anonymous Tim Holt Christmastime 3 stamp set.  I love the different fonts in this set :). I stamped the bag in Fired Brick distress ink and Simon Says Stamp White Pigment Ink.  Super easy!!


For the tag I stamped the sentiment with Gina K. Designs embossing ink and heat set with Simon Says Stamp white embossing powder.  I stamped the snowflakes with the white pigment ink again and the holly leaves were stamped in Archival ink and coloured with Mowed Lawn distress ink and water brush.  The little berries are covered with drops of Autumn Red Nuvo Crystal Drops and match perfectly.  To finish I inked the tag edges with Fried Brick distress ink.  


I'll leave you with another of my favourite Christmas decorations:  Blue Mountain Mouse House :)


Monday, December 28, 2020

Seasons Greetings Gift Bag & Tag Set


Merry Christmas!!  So this year I really wanted to decorate a couple Kraft bags and I decided to make matching Kraft tags as well!!  I love how they turned out!  This is the first set. 


I used the cabin scene and the snowman from the new Stampers Anonymous Tim Holtz stamp set Winterscape.  The sentiments are from the Tiny Text Christmas stamp set.  On the bag, I used Forest Moss distress ink and I used the splatter brush to apply picket fence paint to create a snowy scene.  


I stamped the snowman in Archival Ink and coloured them in with Forest Moss and Fired Brick Distress Markers and a water brush.  The white on the snowman is actually Distress spray stain.  There is a tiny snow stamp that I used for the snow on the tag.  To finish I sponged around the tag in Forest Most distress Ink again and then just around the edge in Black Soot.  


To finish I'd like to share a pic of Remi with his stocking and some of my favourite Christmas decorations:  


Wednesday, December 16, 2020

'tis the season - Christmas Card

I've had this Merry Moose die since sometime last year and I finally used him!  I love how Merry he looks trotting along.  He has gone to my step-son and his girlfriend to their first home.  I combined several techniques from ideas I found online.  

The background sky is Blueprint Sketch distress ink with a touch of Black Soot to the edges.  I sprinkled water on the background and then applied texture paste through the Speckles Stencil to create snow and interest.  

The trees were cut out of Classic Kraft paper and inked to darken.  I applied texture paste for snow on the branches and then applied some Sharpie white paint pen since the texture paste reacted the ink a bit on the boughs.  


The star of the show - Merry Moose!!  He was also cut from Classic Kraft paper, sanded for some more distress then I added some black soot to his hooves to darken them up a bit.  His antlers were super fun - I used the smooshing technique with oxide inks and then once dry I added some darker distress ink to the tips.  I love the little cut areas for his eyes and nostril.  


For the snow I die cut some hills and applied texture paste with a spatula so I could get a realistic look.  Love how that looks!!  After I adhered everything to the background I mounted it on a paper from the Yuletide paper pack.  To finish I added a few stars and a quote chip.  The inside sentiment is stamped in Vintage Photo distress ink using a stamp from the new Christmas release set Bold Tidings 3.  


Supplies:

Tim Holtz Produts:
Merry Moose Thinlits 663103
Speckles Stencil THS021
Bold Tidings 3 Stamp CMS420
Christmas Quote Chips TH93655
Distress Inks, Oxide Inks
Yuletide Paper TH93240
Classic Kraft Paper TH93585

Wendy Vecchi Embossing Paste
Simon Says Stamp Stitched Slopes and Hills Die

Saturday, December 12, 2020

Oh Little Star (shine bright) - Unity Planner Journal

I finally coloured up these cute little deer from Unity Stamp Co.  I gave them shiny noses with Glossy Accents and the light bulbs and little hearts have some shimmer from Wink of Stella.  The snowflakes are Glitz glitter gel through a Tim Holtz stencil, Flurries.  The border is a couple washi tapes I've had for some time in my stash.


You can really see the shimmer in the Glitz glitter gel in the close up.


Saturday, November 21, 2020

Weird is Just a Side Effect of being Awesome - Unity Planner Journal

Love this little guy and the sentiment!!  I decided I wanted to sort of mimic a card I made with him quite a while back but this time I decided to colour him.  You can see the card I made for him here.  I did a bit of masking along the edges so I could get the red and black borders and then I lined the inside of the black with Glossy Accents and sprinkled Clear Rock Candy Distress Glitter.  I like this glitter because it stays put!!  


I coloured him with copics and added Glossy Accents to his lenses and added some ink through the Simon Says Stamp Falling Stars stencil for the starry background.


Tuesday, November 17, 2020

Remi - 6 x 6 Layout - and intro to our new pup

Meet Remi :). He made it onto his first page - a 6 x 6 fall layout.  He's a character, that's the best way to describe him.  He came to us when we needed joy the most this past February.  He was born Dec. 23/19 and is a Whoodle - half wheaten terrier, half poodle.  He has more energy than any dog I've had and keeps us laughing.


I love the dimension on this page with the copper coloured Thickers and the little wooden acorn.  The pile, jump and smile sticker is also popped up.  I just can't capture the shine and colour of the Remi letters - they're so coppery!


Supplies:

Simple Stories, Pebbles, Jen Hadfield patterned papers and stickers
American Crafts Cozy Gold Thickers


Monday, November 16, 2020

Wonderful Moments - Art Journal Page

I'm not quite ready to let go of fall just yet so I made this page for a new 8 x 8 album I’m starting.


The background is spiced marmalade spray stain and spiced marmalade, vintage photo and iced spruce oxide inks. I used crackling campfire through the gingham stencil and added some gold foil and speckles stencil to finish the background.
Dies used are skeleton leaves, handwritten journey and friendship words. I also used some vellum ephemera and an enamel tag coloured with alcohol inks and then finished off with rub-ons.


The leaves are coloured with speckled egg, iced spruce, spiced marmalade and vintage photo oxide inks and vintage photo distress ink on the edges.

These leaves were tough for me. I managed to salvage the ones used using less saturated paper and adding more colour after die cutting. The original leaves I cut would not cut properly, possibly because the paper wasn’t completely dry from the oxide sprays? Not sure. That's the first time that’s happened to me.


Sunday, November 01, 2020

In the Dead of the Night - Art Journal Page

Since I was late to the game (Halloween crafting that is) and had so much fun with the page I did yesterday I decided to get one more page done for my disc bound journal while still in the spirit!!

This was really fun, I took my time and it turned out just as I imagined!!  


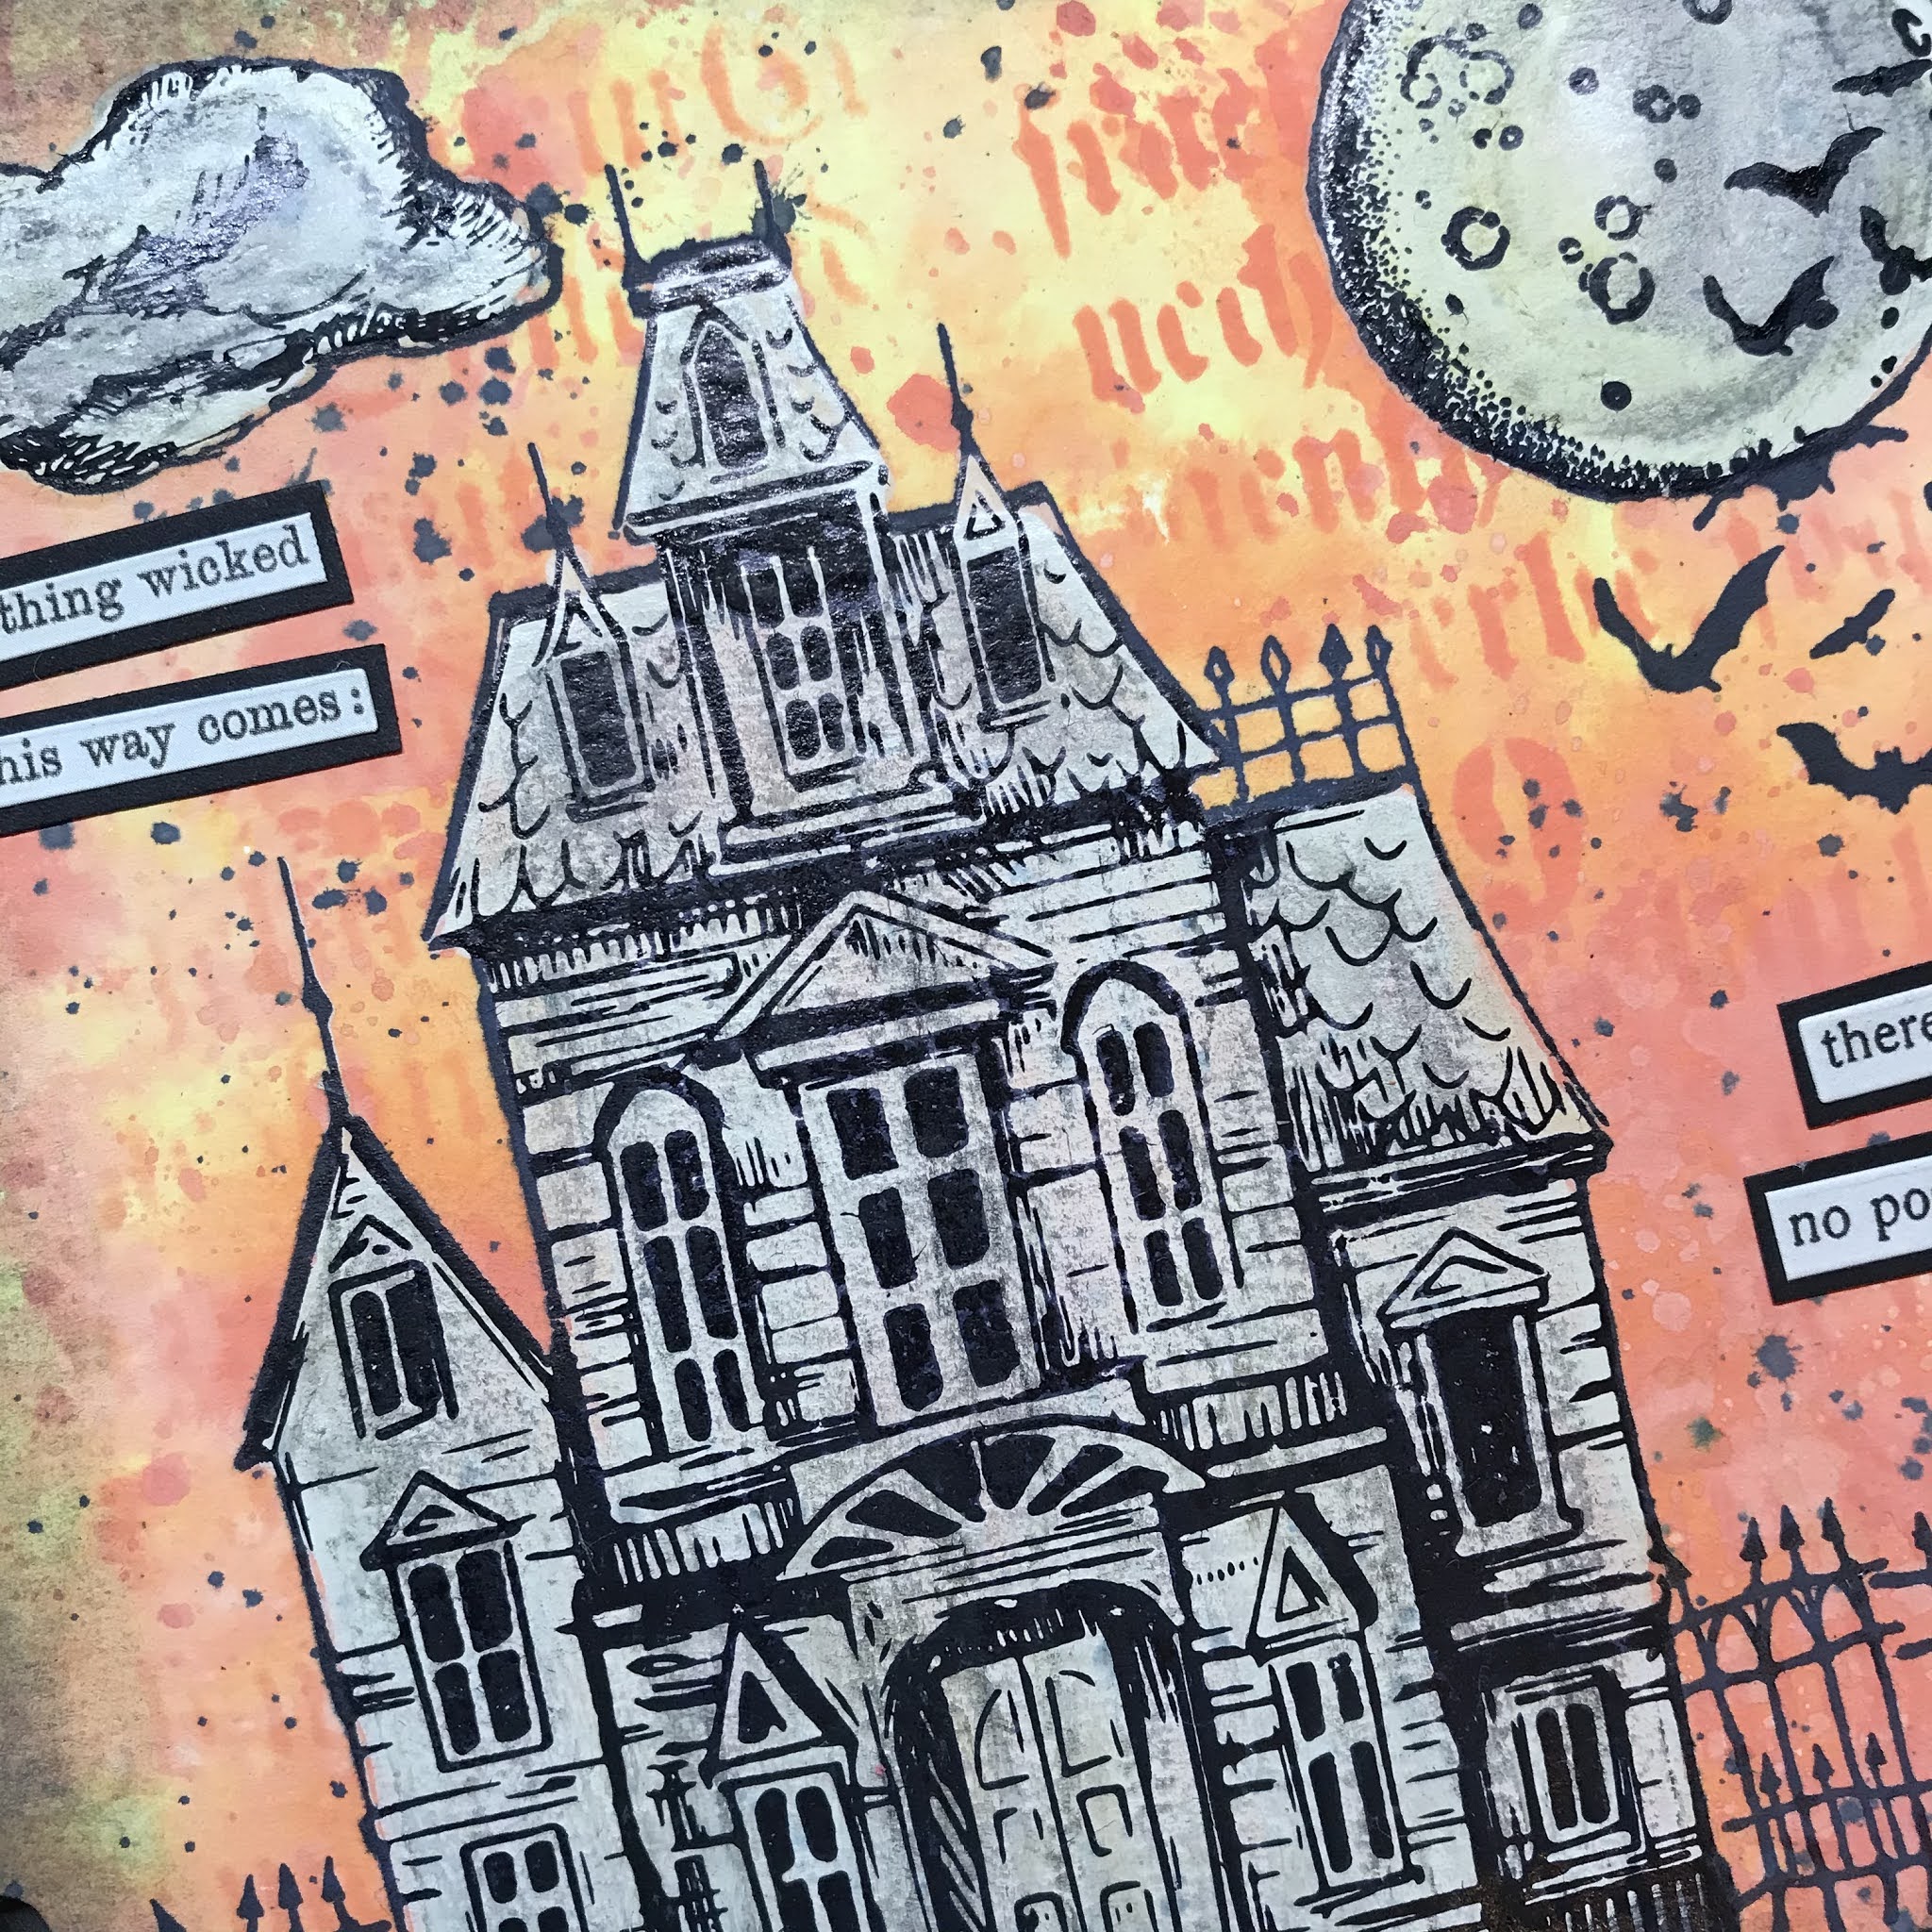
I started with a distress oxide ink background using Squeezed Lemonade, Spiced Marmalade and Ripe Persimmon.  This time I smooshed all three inks on my mat, spritzed and dragged my card through all three a few times, drying between layers until I was happy with the background.  I used the Halloween Script stencil with Ripe Persimmon oxide ink and added a few droplets of Black Soot and distressed the edges of the page with Black Soot oxide ink as well and I was done.


Since the images from the Sketch Manor stamp set are mostly just outlined images and I didn't want to have to stamp them separately, colour them and then adhere them I decided to try this technique by Jenny Marples and it turned out perfectly!! 

To start, using my stamp platform I stamped the haunted house with Antique Linen oxide ink and let that dry.  Now that I had the outlined image, using Antique Linen paint and a small brush I filled in the stamped area.  Because I was painting over the oxide inks they did react a bit, but I was okay with that.  I applied a second coat and once that was dry, I added some Hickory Smoke crayon to grunge it up a bit.  And because my stamp was on the platform, all I had to do was stamp again over the painted image with archival ink and I had a perfectly aligned haunted house!!  I repeated the same steps for the cloud and the moon.  I added a bit of Squeezed Lemon crayon to the left edge of the moon.


I added some Clippings Stickers and since they were an off white I applied some Antique Linen Distress Ink to the Quote Chip so the words weren't so stark white and matched everything else.  I added some black cardstock to the bottom for a base for the house and stamped the fence and bats and I was done!!


Supplies:

Stamp Set:  Sketch Manor
Stencil:  Script
Inks and Mediums:  Ripe Persimmon, Spiced Marmalade, Squeezed Lemonade, Antique Linen and Black Soot Distress Oxide Inks, Antique Linen distress ink, Hickory Smoke and Squeezed Lemonade distress crayons
Extras:  Tim Holtz Halloween Quote Chips, Clippings Stickers
Canson XL 110lb watercolor paper
Jobbles discs
Nuvo Deluxe Adhesive Craft Glue
Tonic Studios Tim Holtz Stamp Platform


Saturday, October 31, 2020

She Was Peculiar - Art Journal Page

A little Hocus Pocus today with some Tim Holtz goodies and inspiration from @vickyp_gr and @redfernanne ðŸ’œðŸ§¡ðŸ–¤ This was one of funnest projects I've done in a long time!!


I was excited to start this new 6 x 6 inch disc bound journal after watching several of Vicky's videos.  So many possibilities with different coloured discs and I can size the journals up to 8 x 8 inches.  I can work on the pages before adding to the journal and work to the edge of the page with no bleeding :)

First I created the background by smooshing distress oxide inks on my matt, spritzing with water and dragging my page through, drying between colours.  I used the Spiced Marmalade first, then the Wilted Violet on the two sides and finally Iced Spruce.  I finished with some water droplets and some splats of watered down Black Soot ink.


I stamped the branches from the Sketch Manor stamp set in Black Soot using Tim's stamp platform along the edges and then blended some Black Soot along the edges to frame the page.  

I die cut the witch and cat on black cardstock and then blended a bit of Wilted Violet and Black Soot onto each piece.  I then spritzed both generously with the Distress Resist Spray for a really cool finish.


Lastly I added some washi tape and inked black card stock to the bottom of the page to to ground my witch and to the side of the page before adding the Quote Chips.  It was a perfect perch for the kitty!

Supplies:

Inks and Mediums:  Wilted Violet, Spiced Marmalade, Iced Spruce and Black Soot Distress Oxide Inks, Distress Resist Spray
Stamps:  Stampers Anonymous Tim Holtz Sketch Manor (for the branches)
Dies:  Sizzix Tim Holtz Witchcraft
Extras:  Tim Holtz Halloween Quote Chips, Clippings Stickers and Washi Tape
Canson XL 110lb watercolor paper
Joggles discs
The Happy Planner punch
Nuvo Deluxe Adhesive Craft Glue


Related Posts Plugin for WordPress, Blogger...